Showing posts with label homemade. Show all posts

Sunday, November 6, 2011

Rainbow Themed Birthday Party

Another birthday has come and gone. My sister gave me the idea for a rainbow themed party. She called it Somewhere Over the Rainbow, like in Wizard of Oz. I ended up just going with rainbow everything!


Rainbow colored cupcakes were far easier to make than the many rainbow cake recipes I came across. I used Family Fun's recipe.
I used glass dishes to make the colored cake mix. The coffee didn't go with the recipe, however I'd highly recommend it for a beverage to accompany you while making these cupcakes. It will ensure that you stay awake while adding the batter.
 My daughter gave me the idea to roll the edges is springkles too. They were pretty when finished.
  
I ordered everything I could find in rainbow on Oriental Trading. The bandanas were a huge hit. The sunglasses and suckers were fun too! I also ordere rainbow crayons that the kids had fun drawing with.
The birthday girl is on the right. They had a ton of fun!

I bough the rainbow colored licorice at a local store. Not pictured are the many rainbow balloons that were hung up over the island.

 The birthday girl recieved a new bike for her birthday! It was a big surprise and now that she has been without training wheels for sometime, it was time to upgrade to a big girl bike. She won't be riding barefoot or without a helmet though. :)
The rainbow party was a success thanks to my sister's inspiration.

Tuesday, May 3, 2011

Teacher Appreciation 2011

Teacher Appreciation Week is this week and I am having so much fun creating gifts for my kids' teachers.
Most of these ideas were inspired from A Bushel and A Peck. Check them out at her blog. My goal was to give their teacher's something everyday, but not something so large that became a huge cost for our family.

DAY 1
First up was these glass mason jars filled with pencils. I used my Cricut to cut out the teacher's name and stick on the jar. This was on vinyl...my new favorite thing to cut out with my Cricut. My kids handed them to their teacher at the end of Monday's school day.  

The tags are compliments of the same blog! Thanks a Bushel and a Peck.
Hayden and Natalie had a great time cutting out the tags. They insisted that some left over chocolates should go in the jar too.

DAY 2
Swedish fish with the cute tag for day 2. So easy and a truly sweet treat!
DAY 3
A bottle of water with two juice powders attached. Really fun to gift. I've done this type of gift before and it was a big hit!
DAY 4
Who doesn't love rootbeer? I'm a school teacher myself and would love these cute ideas and fun treats.
DAY 5
Personalized Hand Sanitizer is by far my favorite gift. I plan to do this one over and over again. Not sure who will be getting this gift yet, but love it! I typed up my own saying, which I borrowed from Room Mom 101. Thans for the idea! I printed it first on white paper, then photo copied it onto the clear transparency paper. Then I cut it to fit inside the bottle and I was done!

 So the only other item that is left is for one of the teachers and then my daughter's piano teacher, which would be the glass container filled with chocolate candys. The poem I'm pretty sure I found online, but can't recall where. 

One other thing...I was inspired to pass the joy of teacher appreciation to the music teacher at our school. Thanks again Room Mom 101! So my students and I decorated her door on Monday! It turned out very cute and she was seriously surprised. :)
 
If you can't read this, it says, "You make our hearts sing!"

Saturday, February 19, 2011

Valentine's Crayons

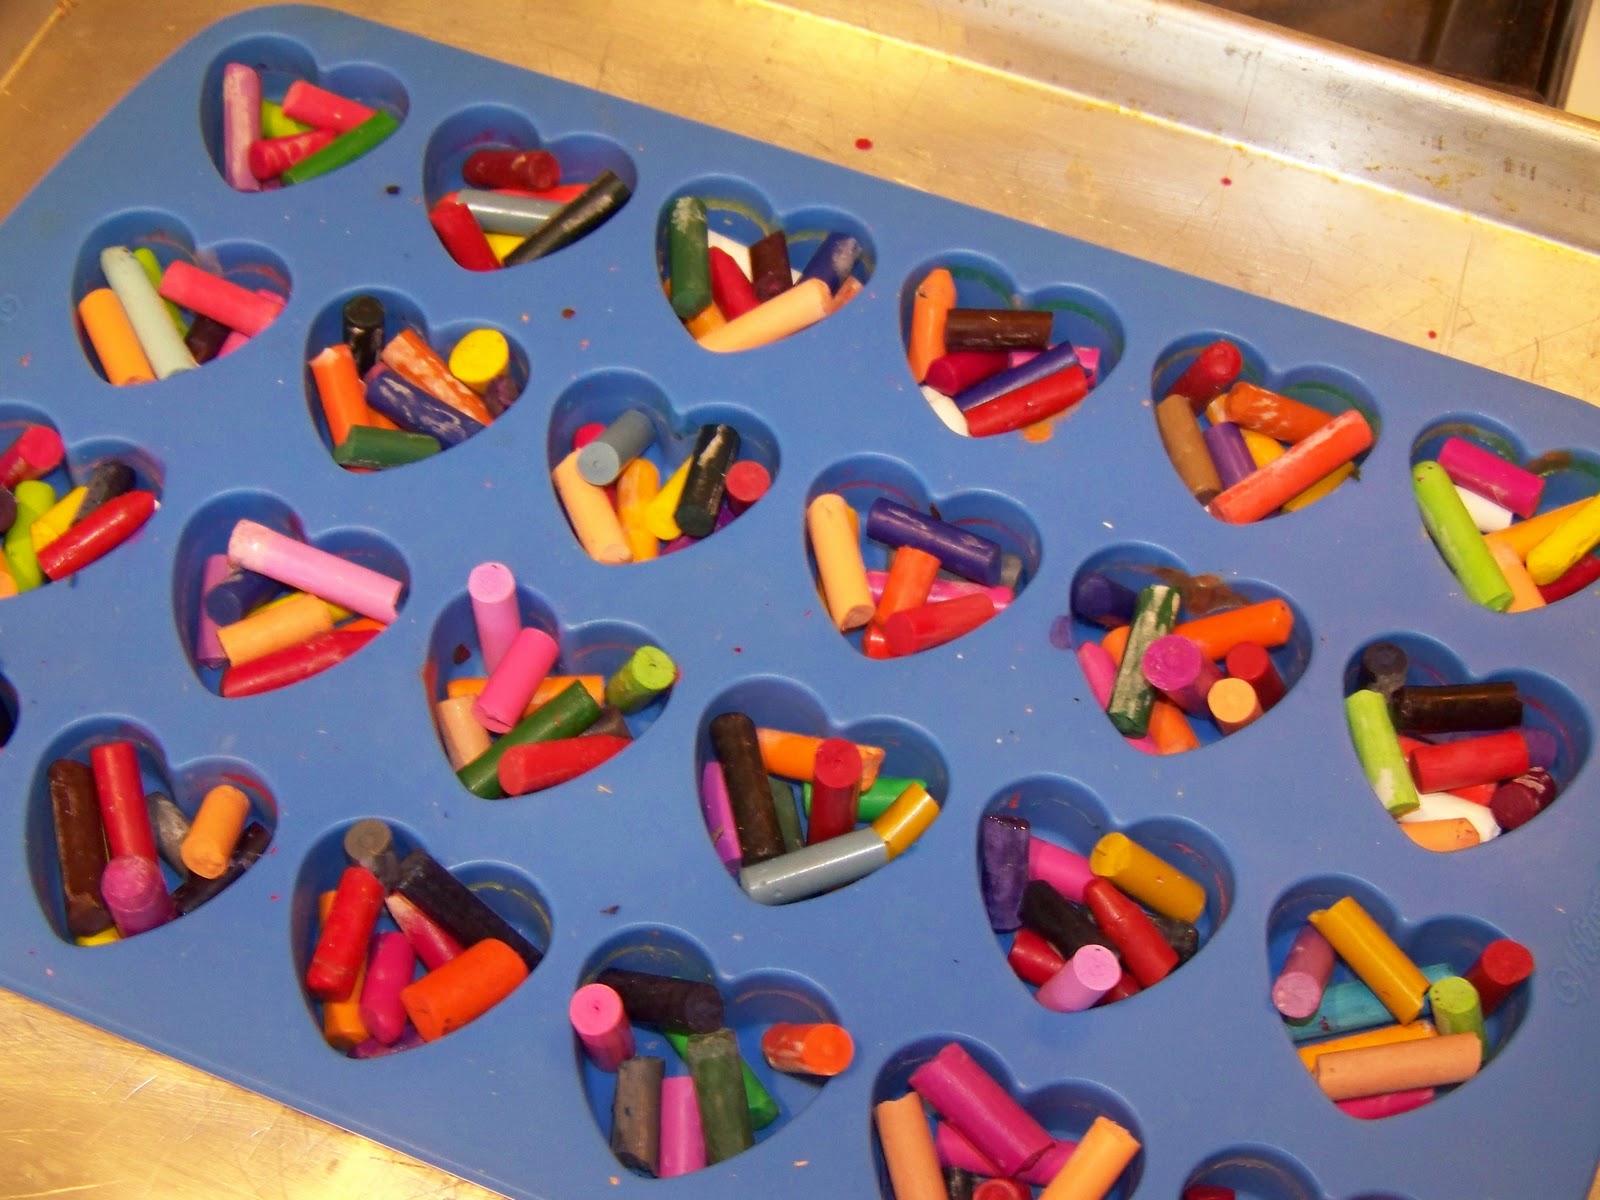
For Valentine's day my kids made crayon hearts to give to their classmates.  We took our old crayons and removed the outside paper from them. Then broke them into pieces and put them into the plastic mold.
 
After breaking the crayons into the mold, I baked them on a metal pan at 250 degrees for about 20 minutes. As soon as they looked entirely melted I pulled them out of the oven and let them cool. Once cooled, they popped right out super easily.

The next step involved gluing the hearts to a piece of card stock paper that said, "You color my world!". I used the hot glue gun, which seemed to do the trick nicely. The kids enjoyed the process and the Valentine's were a big hit. This inspiration came from Family Fun


Monday, January 10, 2011

Be Mine Valentine Buckle


My friend, Brandy, over at Urban Cowgirl Creations has an amazing talent. She makes these fabulous belt buckles, personalized bracelets, and cowgirl rings. My husband, being the sweetie that he is, was sneaky and contacted her to buy me my very own belt buckle for Christmas. I'd been keeping m eye on them for some time and had a heck of a time picking out the perfect one. He also got our daughter one of her bracelets, which she adores. It was such a surprise and man do I love surprises! You have to check out her Etsy Shop! I may just break down and get this new Valentines buckle. It is going to become my new accessory that I swap out like purses. :) Isn't this one cute?

Wednesday, March 31, 2010

Paper Eggs

I came across a project that I thought I'd try with the kids. Thanks for the inspiration, This Is The Year blog! I love the end result. I will say, that my daughter had more fun cutting the strips of paper for me than gluing them on. This blog site has all the details if you want to try them! Another twist on this idea comes from Creative Attempts. Check out that blog to see how she did the same project, but with tissue paper. Super cute!


Paper Cutter Extraordinaire

Seasonal Decor Blocks

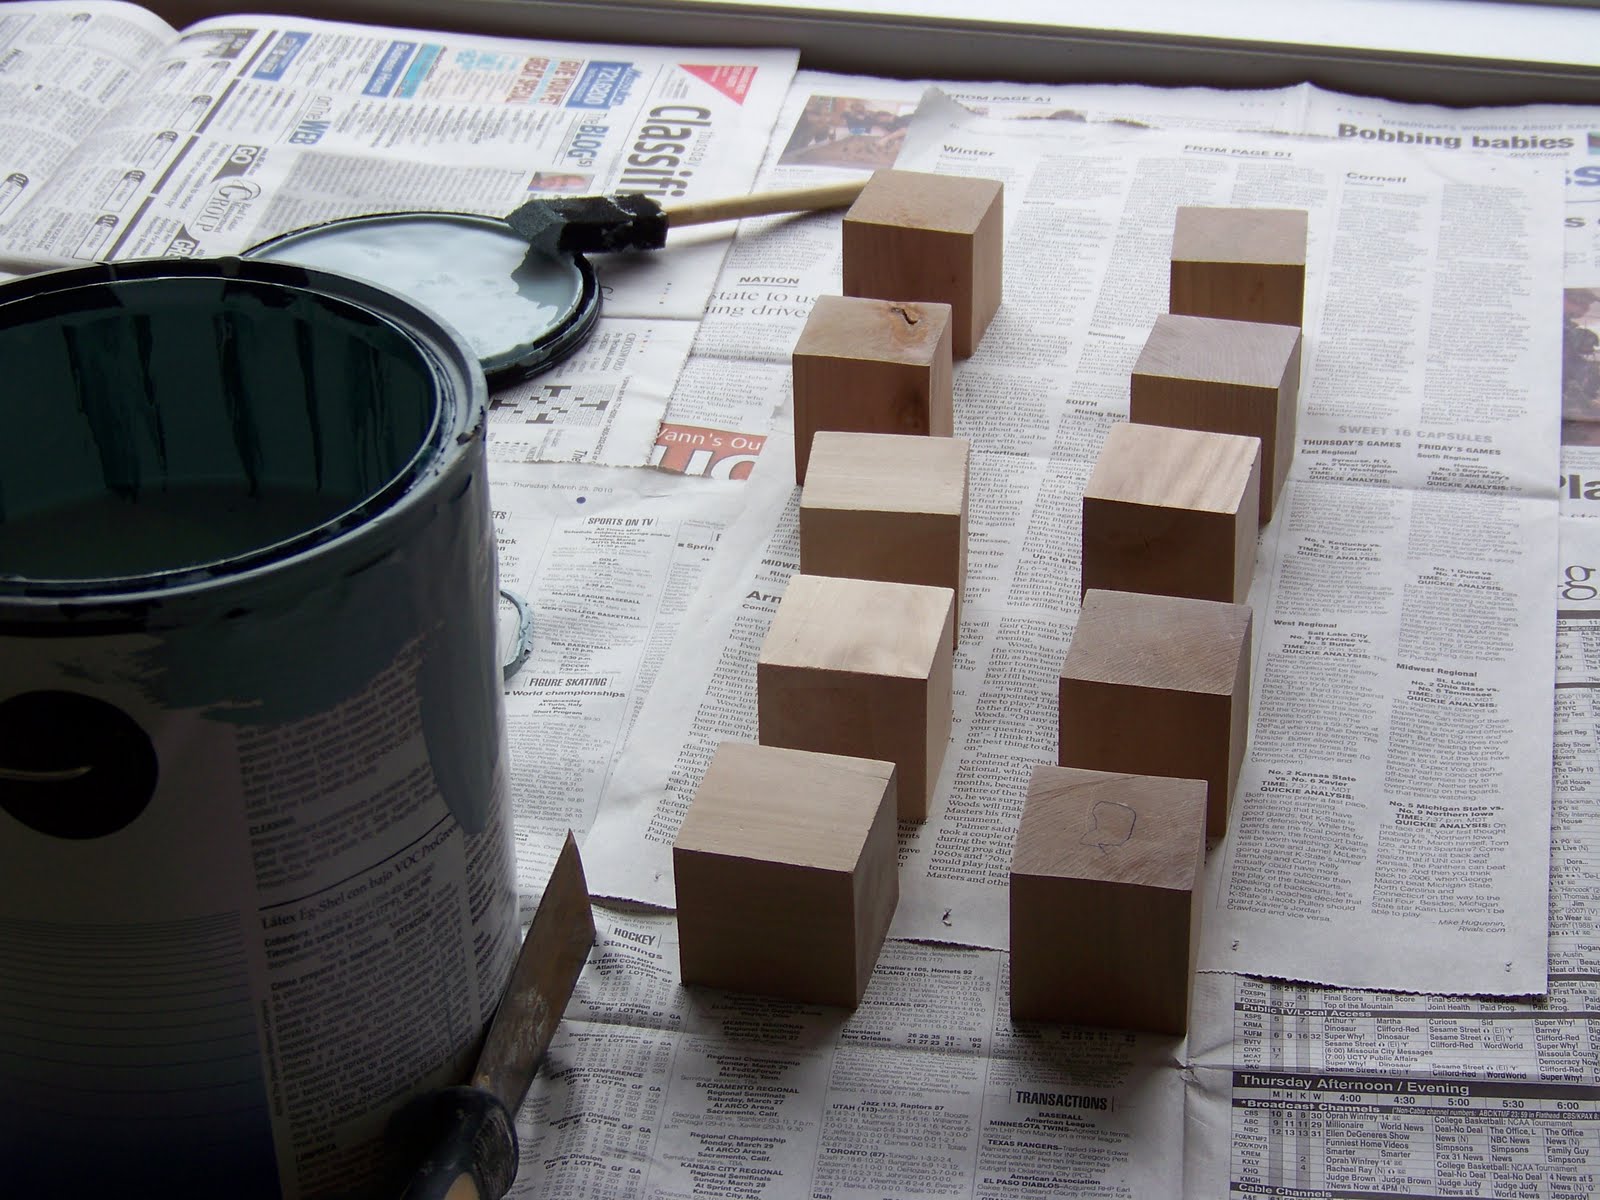
I continually eye these decorative blocks when out shopping. I have no need for restraint now. I made my own. Thanks to Whimsi Kel and the great lists of letters and words, this project really was quite simple.

 I decided to use house paint as my block colors so that they would match my house during all seasons. I started with a base color of Sherwin Williams: Aqua Sphere. I painted five sides and when they were dry I painted the sixth sides. I then watered down some Weathered Shingle (tan color) from Sherwin Williams and brushed it on and wiped it off after a few seconds to get the antiqued look. Once this coat was dry, I cut letters out with my Cricut and used Modge Podge matte finish to secure them to the blocks. I had two extra blocks that I had painted and decided I'd cut out shapes to stick on them. Overall, I am thrilled with the turn out! I can't wait to use them all year round! Thanks Whimsi Kel for this great idea!

Saturday, January 30, 2010

Recipe Box

I have tried many times to organize my recipes. I have bought the books that the cards can fit in, but ran out of room to add plastic protectors. I have the three-ring binder with clippings and printed favorites. I often run from one to the next and then to all the cookbooks I have for the one I'm looking for and can't remember which book or binder it is in. I decided that I want to put all my recipes in one place, so I made this box. It will take me some time to get the recipes that aren't on cards yet ready for the box, but I know in the end I'll be happy to have one place to go looking for those recipes. I used the idea from Sister's Stuff to get me started. Great inspiration!
I added the conversion chart to a card in the back of the box so I could have a quick reference. Just another way to keep organized in 2010.

Sunday, January 24, 2010

Wild Wild West Party

My son wanted a western themed birthday party so of course I did my best to pull that theme together. In the picture, is my kids with grandma Dee testing out the saddle.

I visited a few websites first. Family Fun and Radmacher blog had some cute ideas.
 
HP had a ton of free printable ideas with the western theme in mind:
Western printable kit  (includes customizable boot invites, signs, games, and more)
Western scrapabook kit (borders, backgrounds, journal blocks, and tags)

Wild West Party set 1 (mustache stickers, wanted posters, stage coach invites, and more)
Wild West Party set 2 (iron on, badges, invites, and more)

HP has other themed party, decorations, tags, etc. Here is the link I found to be filled with amazing printables!
HP Creative Studio   Enjoy!

Now back to the party I put together.I found sheriff badges, gold coins, and mini decks of cards to put in the gift bags. Thanks to my mom for putting all these together and having the idea for the napkin rings. Most of my decor items came from her too. Thanks mom!

The napkins were bandannas with small western hats glued to hair ties for napkin rings.

Centerpieces were straw cowboy hats, red bandannas, candles with ripped bandannas tied around them, along with horseshoes. Here's my birthday cowboy next to one of them.

Under my welcome sign, I hung the buckaroos sign, which I made with my cricut. In doorways, we hung strings with boots, badges, cactus', etc. These we found at the local Party America store.


Outside, we set up a cowboy fire pit, saddle, and roping station. To our luck it snowed during the party so we came in and out a lot, but I did have extra gloves handy and hats too. The steer head on the hay bale was a fun game while kids sat on the saddle.


You can see in the background some rope with strips of bandannas strung across the front of the house. This was an easy way to make garland. I had extra strips so I hung a few on the wreath that was still on my front door and added a few horse shoes too.


Here's the homemade stand with the saddle. Thanks to my father-in-law for doing so much of the outdoor work. He brought the hay bales too.I couldn't have thrown the party together without all the help.

The menu:
Cowboy cocoa, root beer, hot dogs, buns, chili, cheese, calico beans, ribs, chips, and veggies.
For dessert, we made smores over the fire pit outside instead of cake! It was a huge hit because the kids could make them.

It was a successful 6th birthday party and a ton of fun for me to put together. Good thing my daughter's next party isn't until September.  This will give me some planning time.

Monday, January 18, 2010

Flag Garland Curtain and Bath Mat


The flag garland/pennant idea came from Sparkle Power and Bison Girl. I love this idea and thought it might be fun to make some for my sons western themed birthday party. I haven't made those yet, but in the meantime I created some for a curtain in our guest bathroom and one for the kids' bathroom, both of which needed some color. Rather than using pinking shears around the edge, I sewed the in reverse and flipped them right side out before I added the binding. This worked pretty slick. Each triangle is 8.5" wide and 11" long. I overlapped them a little to create the curtain look I wanted. I tacked one curtain up and the other I used sticky velcro.

I then decided that the kid's bathroom didn't have enough color, so I made a bath mat using Sew Liberated's tutorial.  It really was a quick project. I whipped up the curtain on Sunday in less than an hour. I cut out the squares for the bath mat quickly and then sewed them together Monday. I am pretty pleased with the end result.I never would have thought about using a quilt for the floor, but how cute it does look and what a great place to add color. Now I'm getting spring fever to start painting the bathroom.